FM Versus Competition – Ed v Chris
Stoke vs Morton
Welcome to a brand new feature some of us within the FM blogging world are looking to bring to you over the coming weeks and months where we pit ourselves, our teams, tactics & pride against each other in a one off, winner-takes-all-the-bragging-rights match.
However this competition is different in that it’s not the result that matters the most…ok it still matters – but what we’re looking to mainly provide is a bit of an insight into our thought process as FM managers as well as a rundown on our team, tactic and in-match analysis when standing on the touchline with each other. So without further ado, let’s stop Ed from waffling on. When you’re done reading this make sure you check out Chris’ take on this game here.
So to kick things off I’m up against Chris Samson (FM_Samo) and his overachieving Morton side. To set the scene my Stoke side have, for the most part, been laying to waste most of the PL & Europe for a few seasons now, so the match-up is slightly skewed, however as mentioned before, it’s more about the journey than the destination (big hint: I won the match, go Stoke!).
So here’s how the teams looked before kick-off:
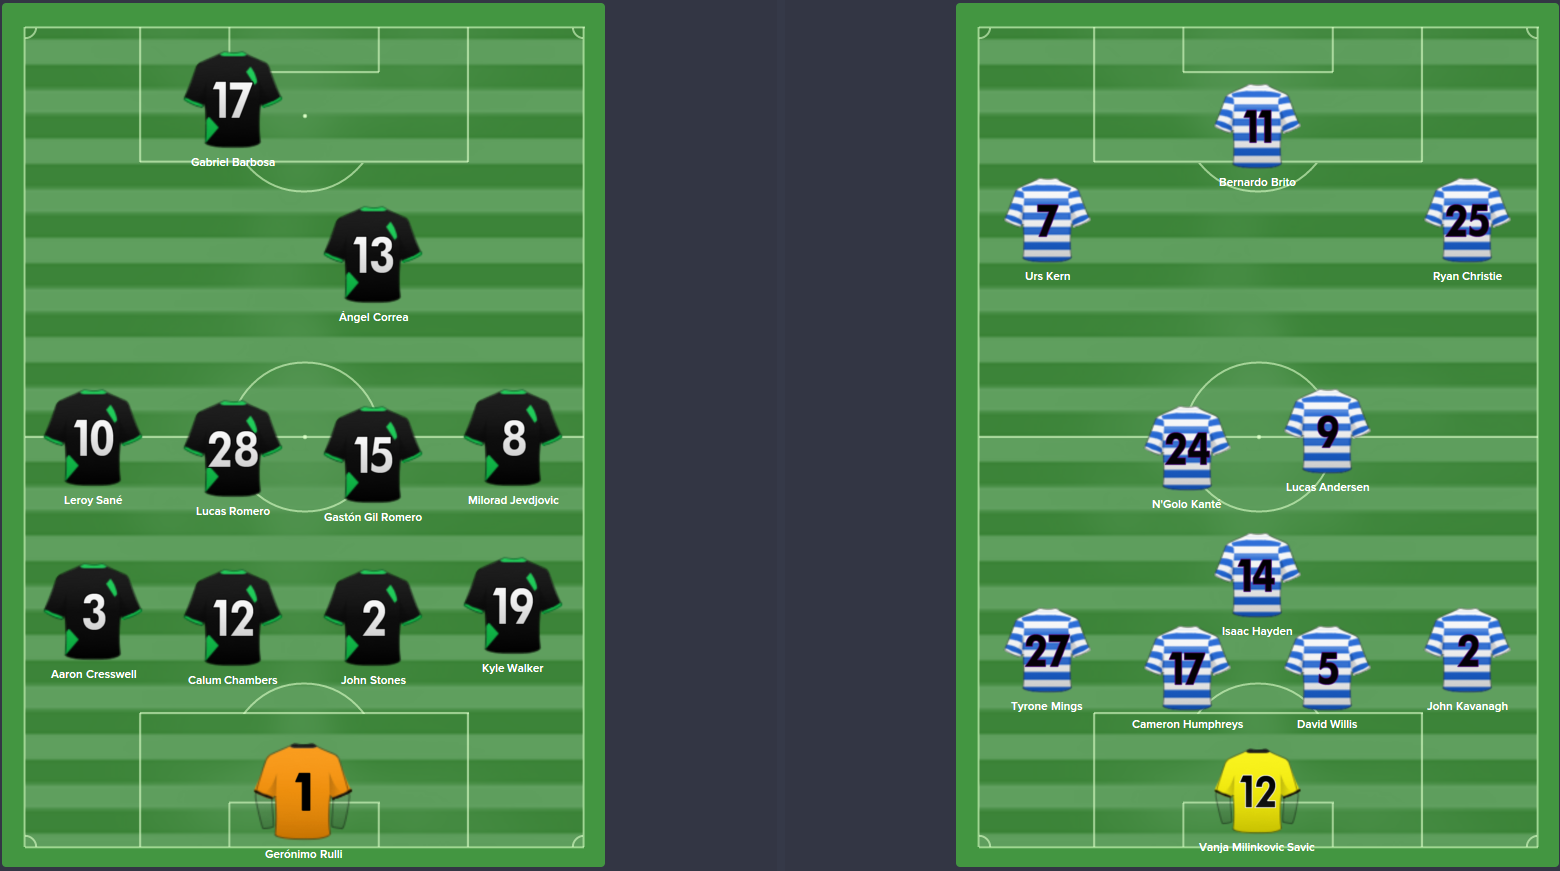
So as you can see I’m in my beloved, slightly lob-sided 4-4-1-1 formation & Chris has gone for a 4-1-2-2-1 / 4-3-3 formation. On seeing Chris’ formation before the kick-off I didn’t make any changes, I know that my team has fared fairly well against this system in the past with the only real threat coming on the counter attack if my full backs have bombed on too bloody far and we for some reason don’t put the ball in the back of the net. Yet I know that Chris had more to worry about that I did (that sounds awful but really no offense is meant Chris). Mind games ey?
And here’s my instructions:
![]()
Stoke’s key men:
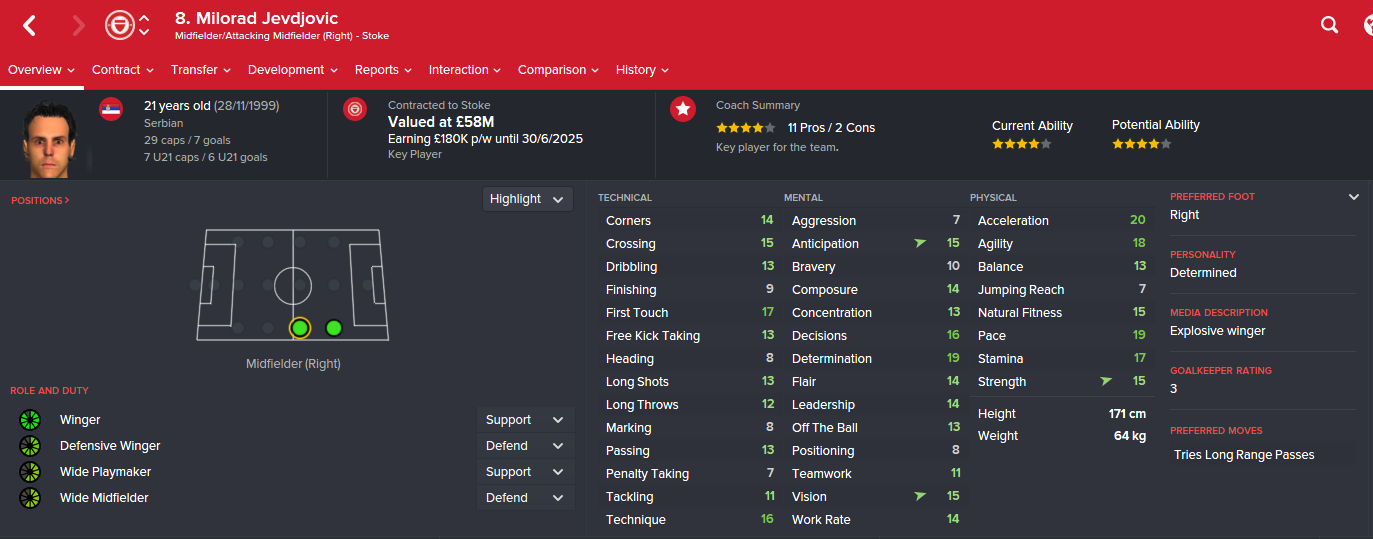
This is the main man right now. My best player and a bloody awesome regen. He dominates the right flank with his pace and power. I play him as a WM-A which may surprise some who would no doubt look at him and cry out that he should be a winger, but hopefully all will be revealed later. He also does a damn good job if getting on the end of left wing crosses from…
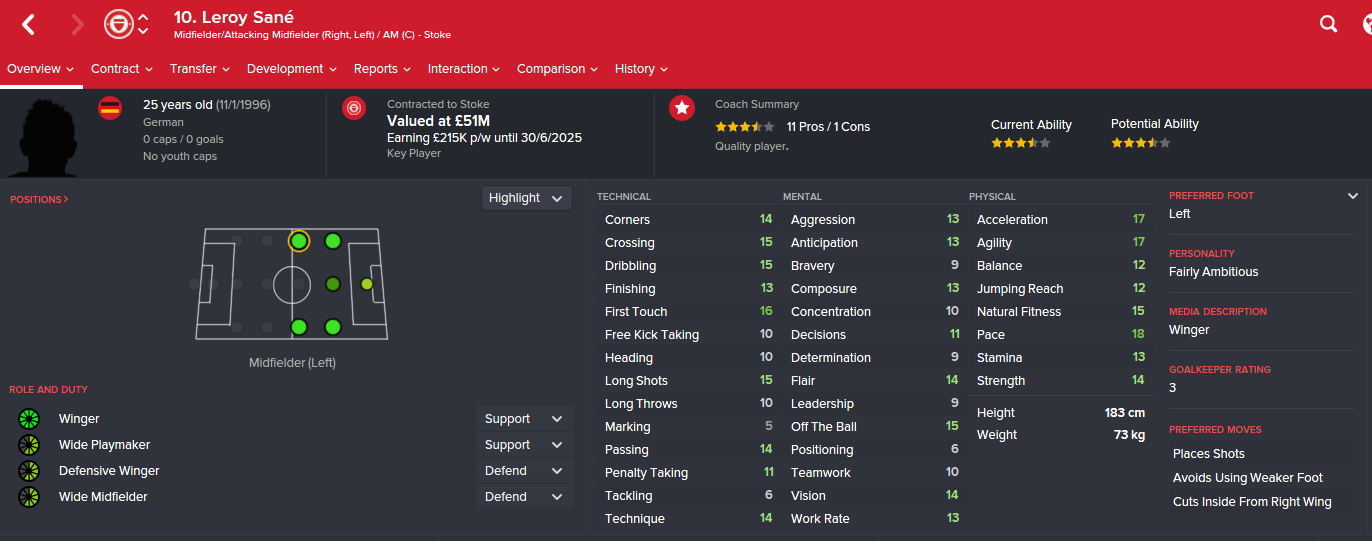
This chap, my first love (not strictly true) and you’d be hard pushed to find two better wide players. Sane is the source of most of my assists because he’s bloody brilliant at whipping in them crosses. Most of them to…
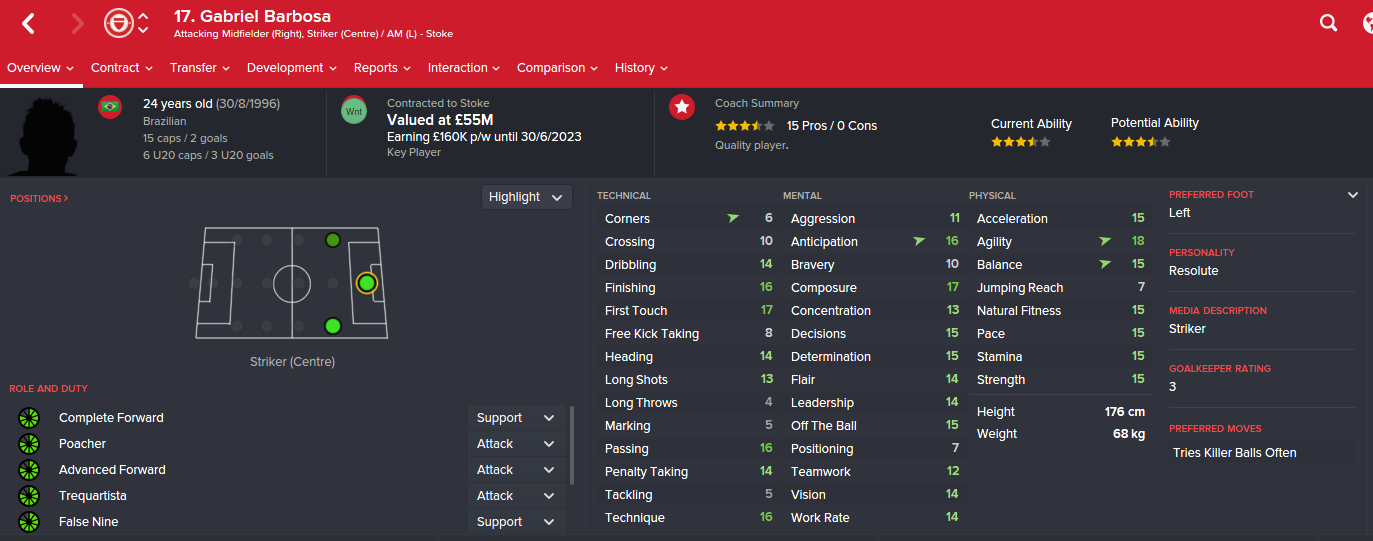
Gabriel Barbosa, Gabigol, Sexy Beast – he goes by many names & he’s nothing short of fantastic playing as an AF-A up top for Stoke. Morton, you have been warned.
Stoke 1-0 Morton (Barbosa – 9mins)
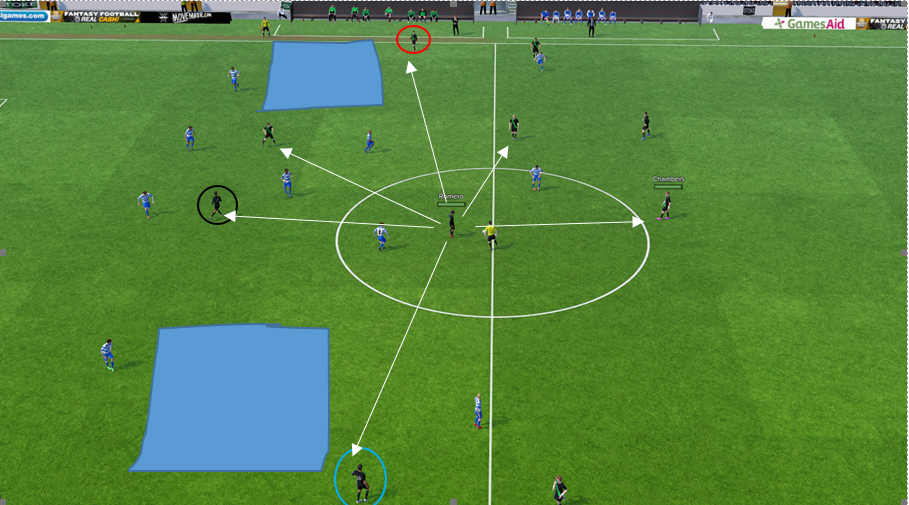
So here we are in the build-up to our first goal, Chambers has played the ball into Lucas Romero. You can see how Morton are set up with quite a structured 4-3-3 and quite narrow sitting full backs and inside forwards. My 4-4-1-1 becomes a 4-4-2 here with both wide men sticking very wide and stretching the pitch. The three danger men are circled, all of which are available to Romero who has a plethora of passing options. The filled boxes also demonstrate just how much space Sane & Jevdjovic have should they receive the ball.
Romero decides to switch it out to the danger man; Jevdjovic (as we look to exploit the flanks).
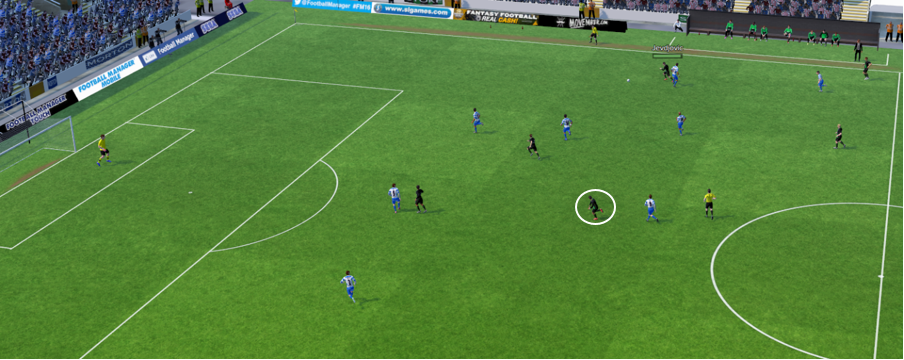
Jevdjovic takes one touch to control it and then his 2nd touch is shown above, lightning turn of pace and he’s beaten his man with ease with acres of space to run into. Romero (circled in white) who played the pass has already bombed past his man to provide support in the attack.

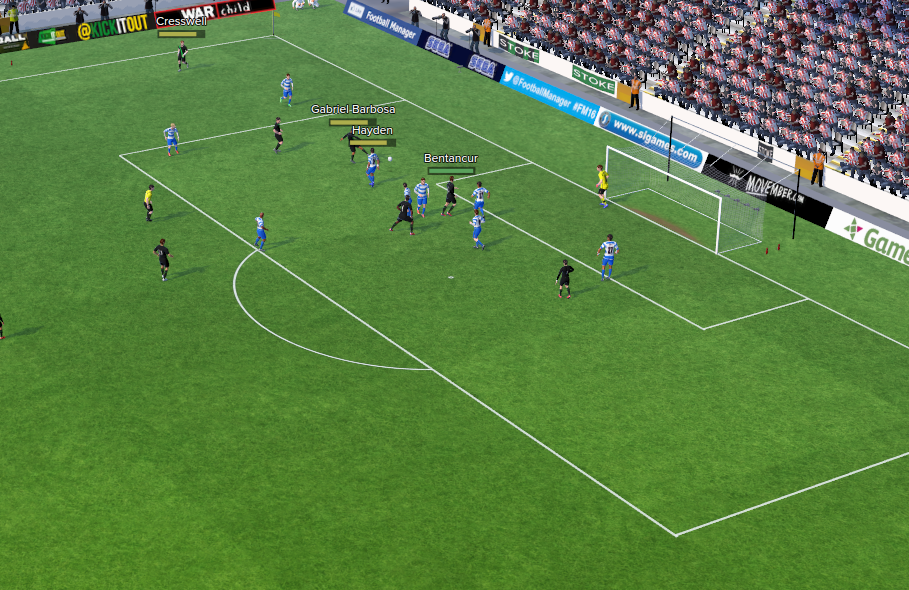
Jevdjovic actually slowed up to allow the defence to get back at him, but he was just toying with them as he gets to the byline and whips in a beauty to the near post as Gabriel Barbosa heads in ahead of his marker. 1-0.
Stoke 1-1 Morton (Kyle Walker O.G – 38mins)
It wasn’t all plain sailing after this as Morton grabbed an unlikely equaliser after 38 minutes through a Kyle Walker own goal.

Their deep lying forward picked the ball up between the lines and plays it square to an advancing central midfield player in Kern, instantly I can see I’m in trouble as Walker goes to press the ball due to my instructions to close down like f*cking crazy. Jevdjovic is fantastic but he’s not completely enamoured with the idea of tracking the full back here and he has oh so much space to run into.

Mings is let loose down the touchline and he fires a cross into the near post, as you can see Walker has done his best to get back into the box to defend but right now he’s not even looking at the ball…and doesn’t look at it once as it cannons off his knee from the edge of the 6 yard box and into the bottom corner past the despairing Rulli. You can argue I was slightly unlucky with the nature of the goal however I was caught out by clever overlapping by Mings and also a victim of my own philosophy to press the ball extremely meaning Walker was caught out.
Stoke 2-1 (Barbosa – 58mins)
A rather fortuitous, if not well deserved lead came about from a throw-in deep in Morton’s half. Chris will no doubt be annoyed at his team’s desire not to clear the ball as it ultimately ricocheted into Barbosa’s path who lashes a volley into the far corner to give Stoke the lead.
Stoke 3-1 (Barbosa – 68mins Hat-trick)
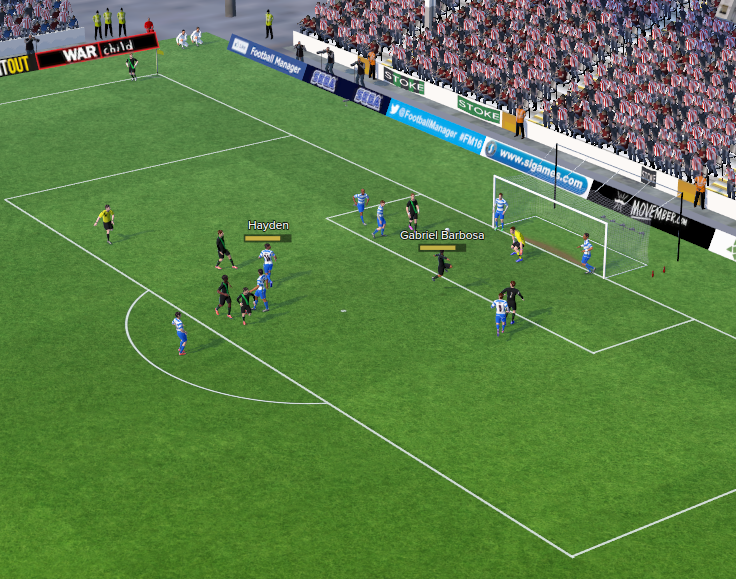
Not a lot to analyse with this goal either, after a lot of pressure by Stoke on the Morton goal Chris will again be extremely annoyed with the marking at this corner. A simple cross to the 6 yard box and Barbosa is unchallenged as he heads into the top corner to settle the tie and bag a hat-trick too.
Summary
As a side note I’ll be showing more of Stoke’s tactical shape and build-up play in a separate blog post in the near future (honestly), but this was a game where we were helped by Barbosa’s clinical finishing as well as some abject defending. We didn’t create a hell of a lot as the stats show:

We had the lion’s share of possession though as you can see we don’t complete many more passes than the opposition; I’m ok with this as I play quite a high risk style of football with the aim of getting the balls quickly to the wide men and letting them attack their man or work the ball around the box till we find an opening. Only two clear cut chances were created and neither of them resulted in a goal funnily enough, with Angel Correa thwarted by the keeper from a corner and Barbosa somehow missing from point blank range after Jevdjovic had yet again skinned his man.
Barbosa picked up PoM however Jevdjovic was the one who really caused problems and indeed completed 12 dribbles in the match, his finishing was woeful given 3 reasonable chances in scoring positions but I’d much rather he look for a pass/cross than attempt to score (he is instructed to do so in his PIs).
As for Morton they rarely troubled us but I put that more down to individuals than anything else, my average player is worth £30m+ so there was always going to be a gulf in class. It has to be said that his deep defence on what I believe may be a counter tactic stifled much of my attacking play and indeed Leroy Sane has a very quiet game and was hooked at half time having only made 1 dribble and offering very little. We struggled to create and had a number of crosses intercepted.
Morton’s full backs were by far their biggest threat to my formation and it was interesting to see how when their striker comes deep, the two inside forwards would tuck in to create space for the full backs as they’d sometimes drag my full backs inside with them.
If I were to play against Chris or a similar system in the future I would definitely worry about how gung-ho my full backs are and may even suggest switching them to defend duties and to sit wider to counter the threat posed by the opposition full backs.
If he were to play me again all I can think of is that he hope Jevdjovic has a little niggle and fails to make the squad.